Authica Guides
Step-by-step guides for configuring Authica. Start with Appearance to brand your login, then add security and UX enhancements.
Appearance
Visuals & Live Customizer
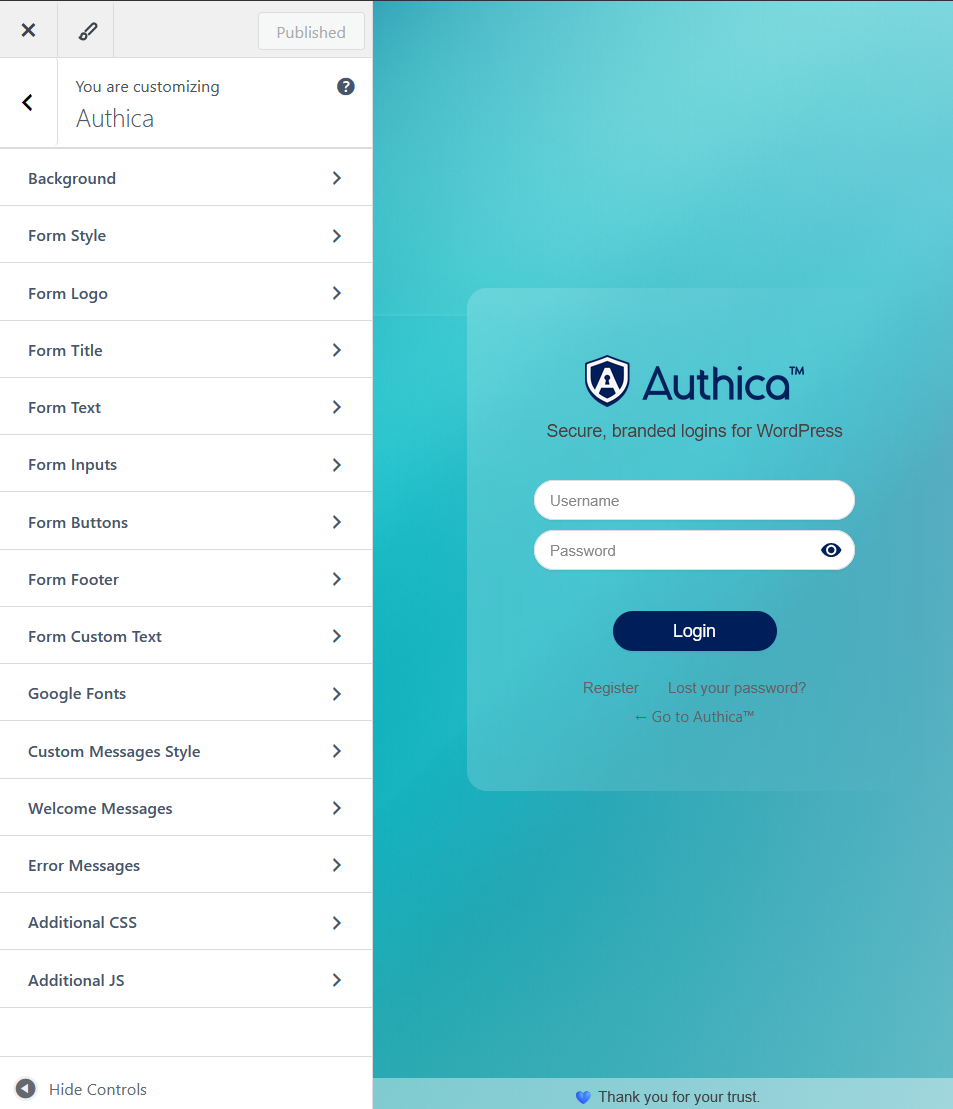
Design your login page with instant preview, no code needed. Tweak layout, colors, and typography across every element and see changes live before publishing.
- Background: images, gradients, overlays, blur/glass effects.
- Form shell: width, radius, shadows, inner overlay.
- Logo & Title: sizing, spacing, alignment, font controls.
- Text & Links: body/links, footer links, hover states.
- Inputs & Buttons: fonts, sizes, colors, borders, focus/hover.
- Typography: system fonts or Google Fonts, per section.
- Messages: welcome/error styles, position, animations.
- Custom CSS/JS: add fine-tuned tweaks when needed.
- Responsive preview: works great on desktop & mobile.
Email Verification
Confirm new accounts before they can log in
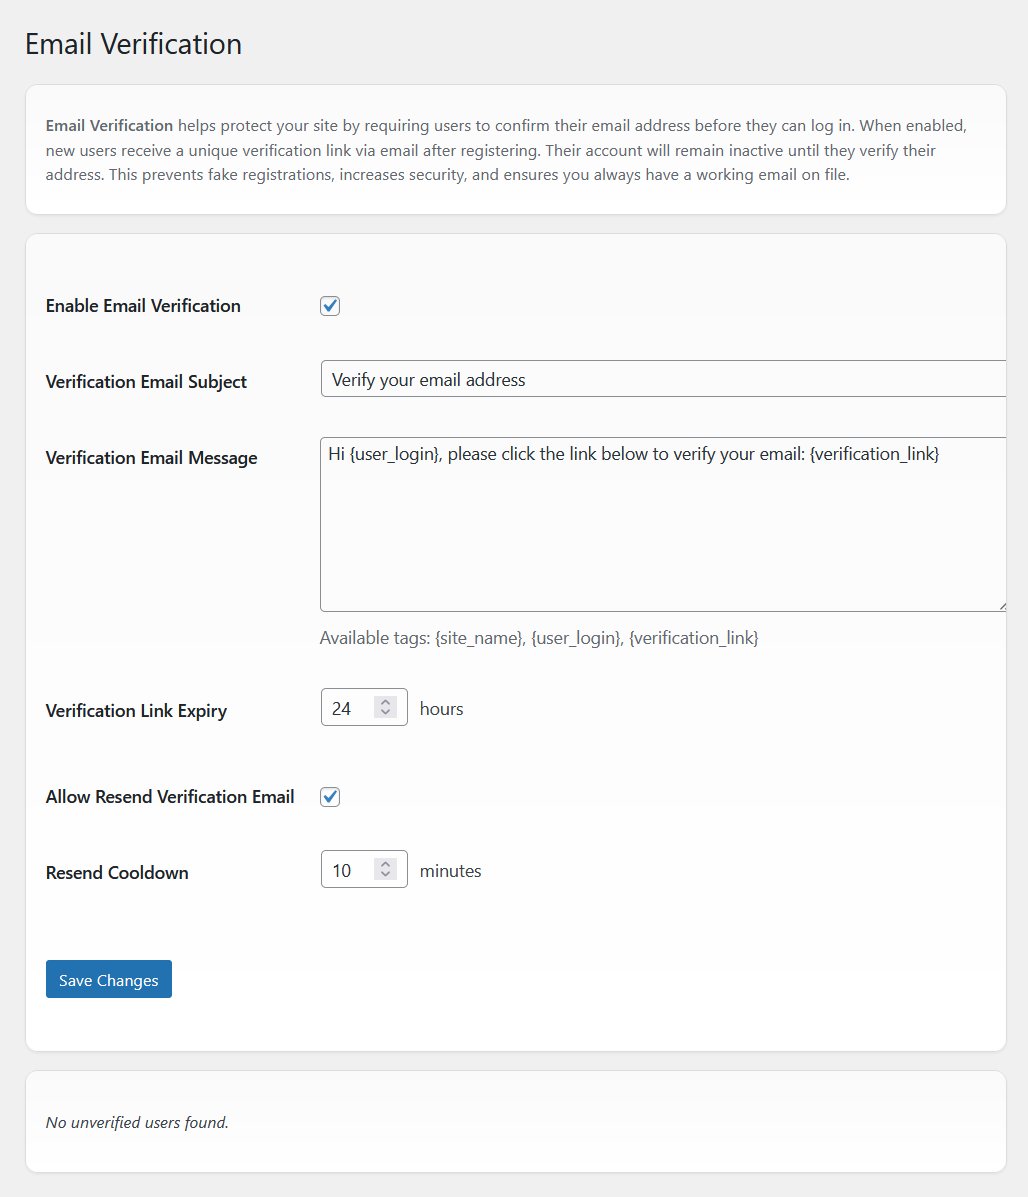
Authica can require users to verify their email address after registration. Until verified, their account is inactive and cannot log in. This blocks fake sign-ups, keeps contact details valid, and dramatically reduces automated abuse.
Key settings
- Enable Email Verification: turn verification on/off globally.
- Verification Email Subject: customize the subject line.
- Verification Email Message: write your own message and include smart tags:
{site_name},{user_login},{verification_link}. - Verification Link Expiry: choose how long links stay valid (e.g., 24 hours).
- Allow Resend Verification Email: let users request a new link if the first expires or is lost.
- Resend Cooldown: throttle resends (e.g., 10 minutes) to prevent spam.
How it works
- User registers ➜ Authica sends a unique verification link by email.
- Account remains unverified until the link is clicked (within the expiry window).
- After verification, the account is activated and the user can log in normally.
- If allowed, users can trigger a resend directly from the login screen.
Best practices
- Keep the subject concise (e.g., “Verify your email address”).
- Place the
{verification_link}near the top of your message for higher click-through. - Use a reasonable expiry (12–48 hours) and enable resend to reduce support tickets.
- Whitelist your “From” address in your mail provider and set proper SPF/DKIM for deliverability.
Bot Protection

Cloudflare Turnstile: modern, privacy-friendly bot defense
Authica integrates directly with Cloudflare Turnstile to protect your Login, Registration, and Lost Password forms from automated abuse. Turnstile is lightweight, respects privacy, and works in the background for a smooth UX.
Setup
- Enable Bot Protection: toggles Turnstile on for all supported forms.
- Turnstile Mode: use Non-interactive in your Cloudflare dashboard for consistent UX with Authica.
- Site Key: public key from your Cloudflare Turnstile dashboard.
- Secret Key: server key used to verify tokens. Keep this private.
- Check keys: renders a test widget and validates your key pair instantly.
Appearance & sizing
- Theme: choose Light or Dark to match your login design.
- Captcha Size: scale the widget (70%–120%) to fit your layout precisely.
Stats & monitoring
The Captcha Statistics panel summarizes Served, Passed, Failed, and overall Success Rate to help you tune sensitivity and confirm protection is working.
Best practices
- Create a dedicated Turnstile site key for each domain/environment (prod, staging).
- Set widget mode to Non-interactive in Cloudflare for the most seamless experience.
- Whitelist your site origin in Cloudflare if you lock keys to specific domains.
- Combine with Email Verification for stronger defense against fake accounts.
Troubleshooting
- “Invalid site key”: confirm the correct domain is added to the Turnstile site key.
- Tokens failing: ensure the Secret Key matches the Site Key and the server can reach Cloudflare APIs.
- Widget not visible: check ad-blockers, CSP rules, and that the mode is not set to an incompatible interactive variant.
Hide / Rename wp-login.php
Reduce bot scans and password spraying by moving the front door
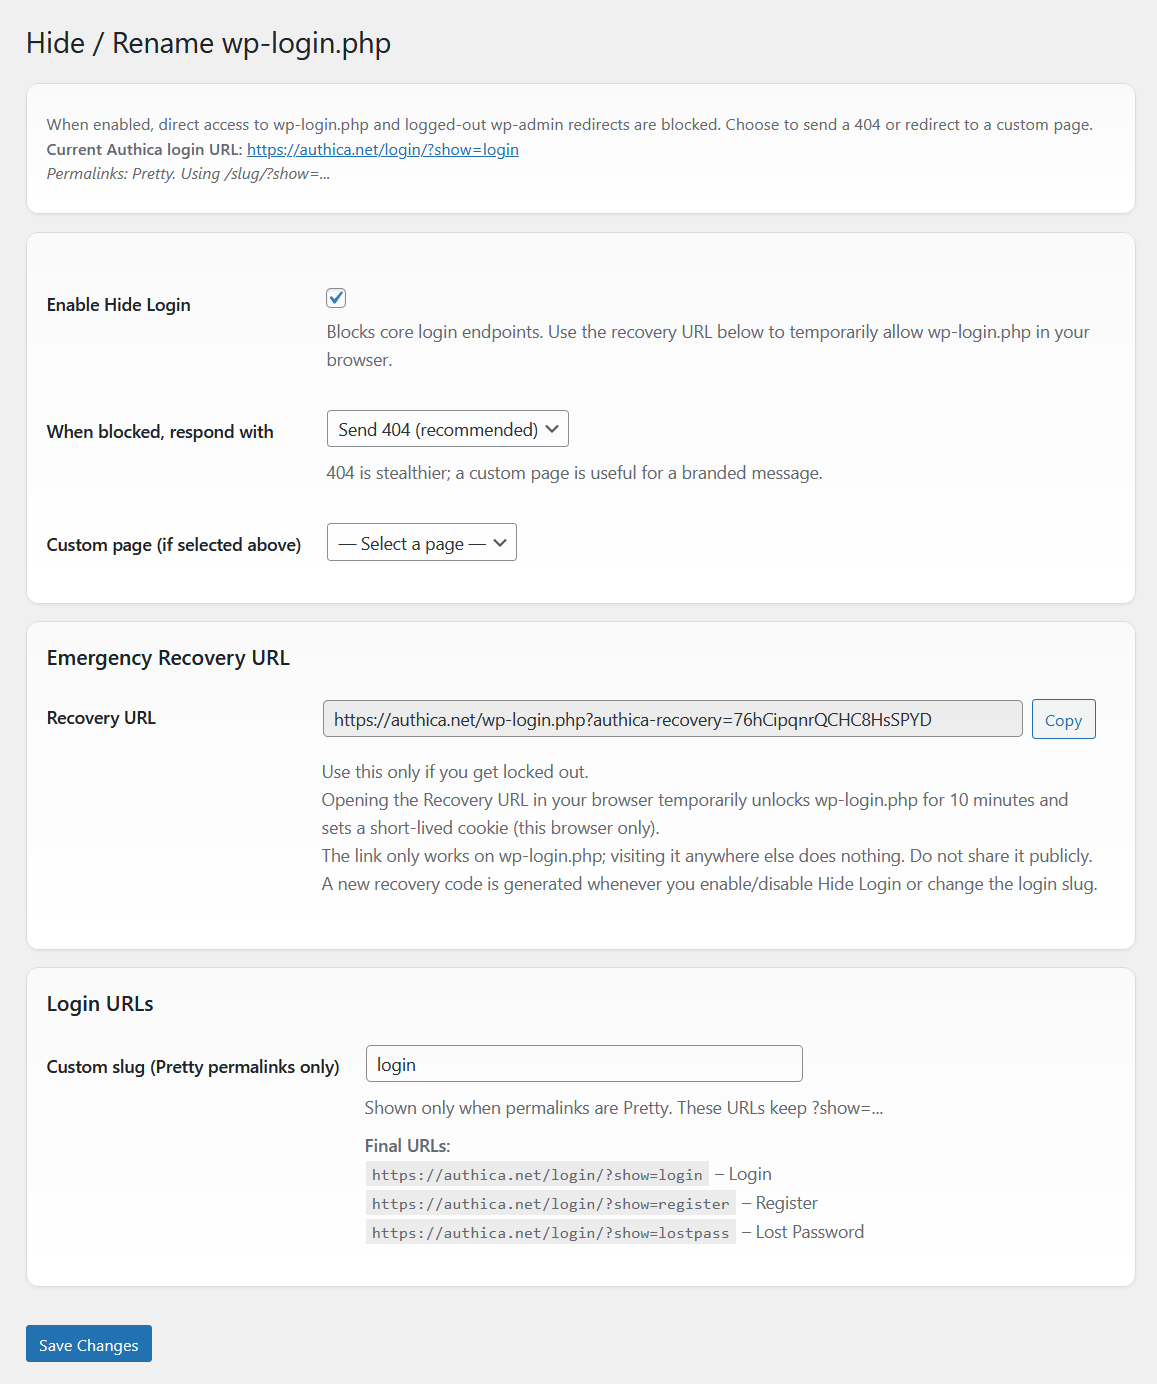
Authica can block direct access to wp-login.php and expose a clean, branded login at a custom slug (e.g., /login). This sharply cuts automated hits on default endpoints while keeping a safe way back in if you ever need it.
Core options
- Enable Hide Login: turns the feature on and blocks core login endpoints.
- When blocked, respond with: choose how
wp-login.phpanswers: Send 404 (recommended) for stealth, or Redirect to custom page for a branded message. - Custom page: if redirecting, pick the page to send blocked visitors to.
Emergency Recovery URL
Locked yourself out? Use the one-time Recovery URL to temporarily allow wp-login.php for 10 minutes in your current browser. Authica sets a short-lived cookie so you can log in and fix settings. A new recovery code is generated whenever you enable/disable Hide Login or change the slug.
Login URLs
- Custom slug: available when permalinks are Pretty; set something like
loginorsignin. - Authica provides final URLs for Login, Register, and Lost Password so you can update menus and links.
Best practices
- Store the Recovery URL in a secure place (password manager). Don’t share it publicly.
- Pair Hide Login with Turnstile and Email Verification for layered protection.
- Avoid easily guessed slugs (e.g.,
/admin,/wp-login); choose something short but unique. - If using a custom blocked page, keep copy neutral and avoid revealing WordPress details.
Troubleshooting
- Can’t access login: open the Recovery URL from the same browser to re-enable
wp-login.phptemporarily. - Custom slug not working: ensure Pretty permalinks are enabled and flush permalinks if you recently changed them.
- Redirect loop: check caching/CDN rules and page-rules that may cache the login URLs.
How to install
Free version (WordPress.org)
Install Authica Free like any other plugin:
- In your WordPress dashboard go to Plugins → Add New.
- Search for “Authica”, then click Install.
- Click Activate.
- Open Appearance → Customize → Authica to style your login page.
Alternatively, you can download the ZIP from WordPress.org and upload it via Plugins → Add New → Upload Plugin.
Pro version
Pro replaces Free. To avoid conflicts, remove the Free plugin first, then install Pro.
- Go to Plugins, find Authica, click Deactivate, then Delete.
- Download your Pro ZIP from your purchase email/account.
- In WordPress, open Plugins → Add New → Upload Plugin, choose the Pro ZIP, click Install, then Activate.
- If prompted, enter your license key to enable updates and Pro features.
Tip: Before switching, note your key settings (e.g., colors, fonts, messages, Turnstile keys, and Hide / Rename login slug). Take quick screenshots so you can re-apply them exactly if needed.
Troubleshooting
- Upload limit: if the ZIP is too large, increase PHP upload limit or install via SFTP to
/wp-content/plugins. - Can’t log in after changing login slug: use your Recovery URL (from Hide / Rename) to temporarily unlock
wp-login.php. - License not accepted: verify you’re on the correct site/domain and there are no ad-blockers blocking the request.