Emergency Lockout Settings
Emergency Lockout is a temporary panic switch that immediately restricts protected areas of your site to trusted IPs on your Allow List. This feature is designed for active incidents, suspicious login activity, administrator account attacks, or moments when you need to quickly reduce access to sensitive WordPress areas.
When enabled, Authica denies access by default and allows only trusted IP addresses that are already listed in your IP Restriction Allow List.
Core Settings
The Core Settings section controls how Emergency Lockout behaves, where it applies, what blocked visitors see, whether the lockout turns off automatically, and how administrators can recover access if needed.
Emergency Lockout should be used carefully because it can block legitimate users who are not on the Allow List.
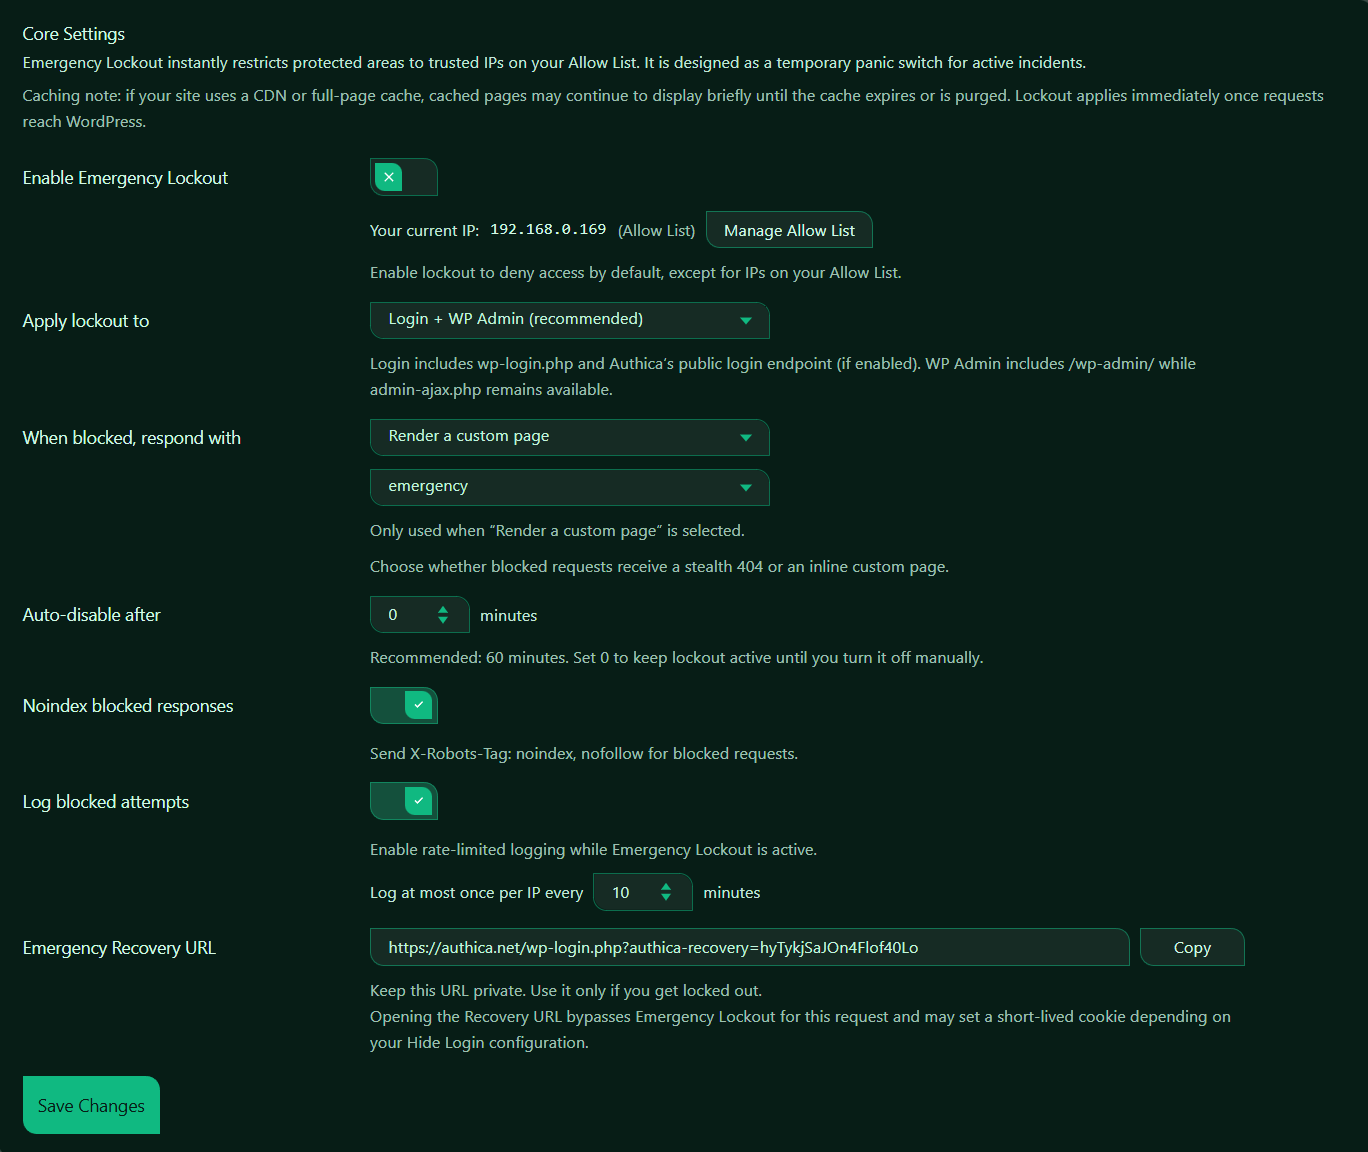
Enable Emergency Lockout
This setting turns Emergency Lockout on or off.
When enabled, Authica restricts selected protected areas to IPs on your Allow List.
Recommended usage:
Enable only during active incidents or urgent security situations.
Use this feature when:
– Your login area is under active attack
– You suspect administrator account targeting
– You want to temporarily restrict access to trusted IPs only
– You need a fast containment option while investigating
Before enabling it, make sure your current IP is already on the Allow List.
Current IP Status
Authica shows your current detected IP and whether it is trusted. This means Authica recognizes your current IP as allowed.
This is important because Emergency Lockout blocks unknown IPs by default. If your IP is not in the Allow List, you may lock yourself out.
Recommended step:
Confirm your current IP is in the Allow List before enabling Emergency Lockout.
Manage Allow List
The Manage Allow List button opens the Allow List section where trusted IPs can be added or reviewed.
Use this before enabling Emergency Lockout to confirm that the correct administrator IPs are allowed.
Typical Allow List entries include:
– Your current IP
– Trusted administrator IPs
– Office IPs
– VPN IP ranges
– Maintenance team IPs
Do not enable Emergency Lockout until the required trusted IPs are listed.
Apply Lockout To
This setting controls which protected areas Emergency Lockout applies to.
This means Authica protects both the login area and the WordPress admin area.
Login
Login protection includes:
wp-login.php
Authica public login endpoint, if enabled
This prevents untrusted IPs from accessing the login form.
WP Admin
WP Admin protection includes:
/wp-admin/
This restricts access to the WordPress admin dashboard.
Recommended setting: Login + WP Admin
This gives strong protection during an active incident.
When Blocked, Respond With
This setting controls what blocked visitors receive when Emergency Lockout denies access.
Depending on your Authica configuration, response options may include:
– Stealth 404
– Render a custom page
Stealth 404
A stealth 404 response makes the protected area appear as if it does not exist.
Use this when you want a more discreet security response.
Render a Custom Page
This shows a custom selected WordPress page to blocked visitors.
Use this when you want to display a branded message, maintenance notice, emergency access explanation, or support instructions.
Recommended usage:
Use Stealth 404 for maximum discretion.
Use a custom page when legitimate users may need a clear explanation.
Custom Emergency Page
The second dropdown under the blocked response setting is used when Render a custom page is selected.
This means blocked visitors receive the selected custom page instead of the normal login/admin page.
This field is only used when the response mode is set to render a custom page.
Good custom page content may include:
– A short maintenance or security notice
– Instructions to contact the site administrator
– A neutral message that does not reveal sensitive security details
Avoid exposing internal attack details or security configuration on the public custom page.
Auto-disable After
This setting controls whether Emergency Lockout should turn itself off automatically after a set number of minutes.
Common values:
0 minutes Manual disable only
30 minutes Short incident window
60 minutes Recommended default
120 minutes Longer investigation window
Use 0 only when you intentionally want lockout to remain active until an administrator disables it manually.
Noindex Blocked Responses
This setting sends a noindex directive for blocked responses.
When enabled, Authica sends: X-Robots-Tag: noindex, nofollow.
This tells search engines not to index blocked lockout responses.
Recommended setting: Enabled.
This is especially important when using a custom emergency page or blocked response, because you usually do not want emergency/security responses indexed by search engines.
Log Blocked Attempts
This setting controls whether Authica logs blocked attempts while Emergency Lockout is active.
When enabled, Authica records blocked lockout attempts in a rate-limited way.
Recommended setting: Enabled.
This helps you review who tried to access protected areas during the lockout.
Log Rate Limit
The log rate limit controls how often Authica records blocked attempts from the same IP.
This prevents the log from being flooded if the same blocked IP keeps retrying.
Recommended values:
5 minutes More detailed logging
10 minutes Balanced default
30 minutes Lower log volume
A shorter interval records more detail. A longer interval keeps logs cleaner during heavy attack traffic.
Emergency Recovery URL
The Emergency Recovery URL lets administrators recover access if they get locked out.
This URL should be kept private.
Opening the recovery URL can bypass Emergency Lockout for that request and may set a short-lived cookie depending on the Hide Login configuration.
Important:
Do not share the Emergency Recovery URL publicly.
Store it somewhere secure before enabling Emergency Lockout.
Good places to store it:
– Password manager
– Private administrator notes
– Secure internal documentation
Copy
The Copy button copies the Emergency Recovery URL to your clipboard.
Use this before enabling Emergency Lockout so you have a recovery path available.
Recommended step:
Copy and securely save the Emergency Recovery URL before turning on Emergency Lockout.
Save Changes
After changing Emergency Lockout settings, click Save Changes.
Settings are not applied until saved.
Recommended workflow:
1. Open the Allow List and confirm your current IP is trusted.
2. Add any other administrator or office IPs that need access.
3. Choose where lockout should apply.
4. Choose the blocked response.
5. Set auto-disable duration.
6. Enable noindex for blocked responses.
7. Enable blocked-attempt logging.
8. Copy and securely save the Emergency Recovery URL.
9. Enable Emergency Lockout.
10. Click Save Changes.
11. Purge CDN/page cache if needed.
Recommended Configuration
For most emergency situations, we recommend:
Enable Emergency Lockout: Enabled only during active incidents
Apply lockout to: Login + WP Admin
When blocked, respond with: Stealth 404 or custom emergency page
Auto-disable after: 60 minutes
Noindex blocked responses: Enabled
Log blocked attempts: Enabled
Log at most once per IP every: 10 minutes
Emergency Recovery URL: Saved securely
For maximum stealth:
Response: Stealth 404
Noindex blocked responses: Enabled
Log blocked attempts: Enabled
For user-friendly emergency messaging:
Response: Render a custom page
Custom page: Emergency / Maintenance / Security notice page
Noindex blocked responses: Enabled
Best Practices
Recommended best practices:
– Add your current IP to the Allow List before enabling lockout
– Save the Emergency Recovery URL privately
– Use auto-disable unless you need manual-only control
– Keep the lockout duration limited during testing
– Purge CDN/page cache during active incidents
– Review blocked attempts after the incident
Important Notes
Emergency Lockout is designed to restrict access quickly.
It is not a replacement for regular protections such as:
– Brute Force Protection
– IP Restriction
– Two-Factor Authentication
– Hide WP Login
– Username Protection
Use it when you need a fast, temporary containment layer.
If your IP address changes often, be careful. You may need to update the Allow List before relying on Emergency Lockout.