IP Allow List
The Allow List contains trusted IP addresses and IP ranges that Authica should treat as explicitly allowed.
Allow List entries are useful when you want to make sure specific visitors, administrators, team members, offices, or trusted networks can access protected areas of your site.
The Allow List works together with the main IP Restriction settings.
Important behavior:
– Allow List entries are explicitly trusted
– Deny List entries are always blocked
– The Default Policy controls IPs not found in either list
This means the Allow List is most important when your Default Policy for Unknown IPs is set to Deny.
Current IP Notice
At the top of the page, Authica shows your current detected IP address.
In your screenshot, the notice says:
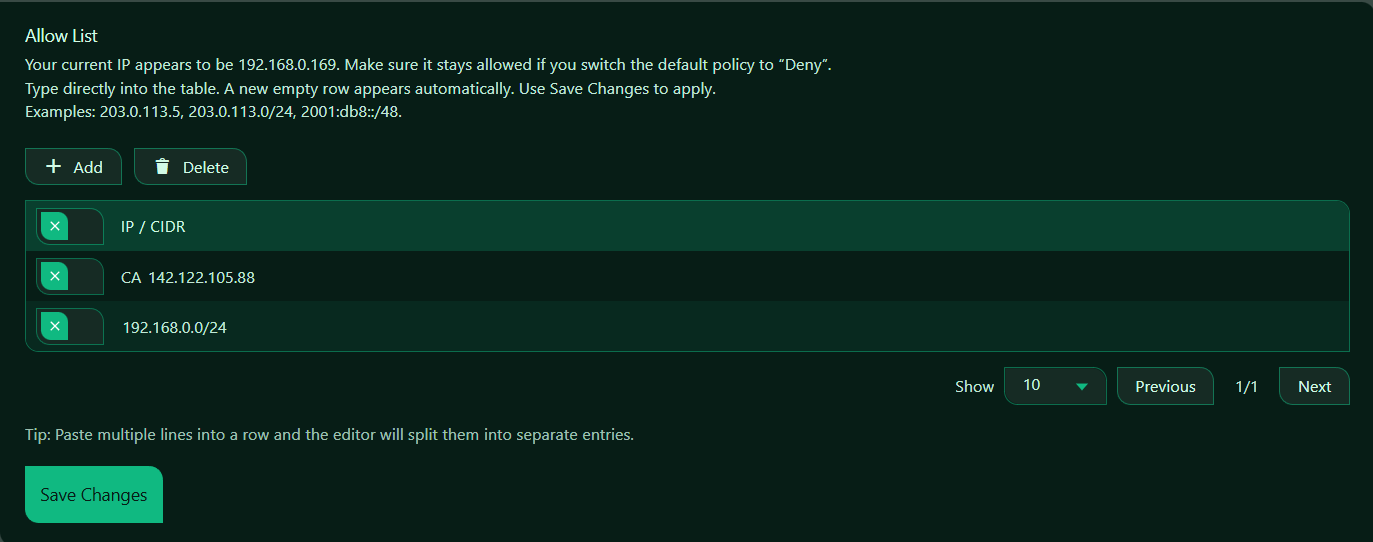
Your current IP appears to be 192.168.0.169. Make sure it stays allowed if you switch the default policy to “Deny”.
This warning is there to help prevent accidental lockout.
If you plan to use a stricter IP Restriction setup, make sure your own current IP address is included in the Allow List before enabling a deny-by-default policy.
What You Can Add
The Allow List accepts:
– Single IPv4 addresses
– IPv4 CIDR ranges
– Single IPv6 addresses
– IPv6 CIDR ranges
Single IP Address
Use a single IP when you want to allow just one exact address.
Example: 203.0.113.5
This allows only that one IP.
CIDR Range
Use a CIDR range when you want to allow a subnet or a group of IP addresses.
Example: 203.0.113.0/24 or 2001:db8::/48
This allows the full IPv4 subnet or IPv6 range. Use CIDR carefully. A wider range allows more addresses.
Add Button
The Add button inserts a new empty row into the table.
Use it when you want to manually add another Allow List entry.
After clicking Add, type the IP address or CIDR block directly into the new row.
Recommended usage: Use Add when entering new trusted IPs one by one.
Delete Button
The Delete button removes selected Allow List rows.
Before clicking Delete, select the row or rows you want to remove.
Use this when:
– An old IP is no longer trusted
– An office or network changed
– You accidentally added the wrong entry
– A temporary allow entry is no longer needed
Be careful not to delete your own current trusted IP if you depend on it for access.
Selection Column
The first column in the table is used to select rows for deletion or bulk actions.
Select the entries you want to remove, then click Delete.
If no rows are selected, Delete will usually do nothing.
Paste Multiple Lines
This is very useful when you already have a list of trusted IPs.
Example paste:
203.0.113.5
203.0.113.8
203.0.113.0/24
2001:db8::/48
Authica can split them into separate Allow List rows automatically.
Save Changes
After adding, editing, or deleting Allow List entries, click Save Changes.
Changes are not applied until they are saved.
Recommended Usage
Use the Allow List for IPs or networks you trust and want to keep permitted.
Good candidates include:
– Your own current IP
– Office network IPs
– Trusted administrators
– Trusted maintenance or development locations
– Company VPN ranges
For safer setup, especially on the first day:
– Add your own current IP first
– Save changes
– Then change the Default Policy only after confirming your access still works
How the Allow List Works with Default Policy
The Allow List becomes especially important when Default Policy for Unknown IPs is set to Deny.
If Unknown IPs Are Allowed
If the default policy is Allow, then:
– Allow Listed IPs are allowed
– Deny Listed IPs are blocked
– Unknown IPs are also allowed
In this mode, the Allow List acts more like a trusted record, but it is not the only way to gain access.
If Unknown IPs Are Denied
If the default policy is Deny, then:
– Allow Listed IPs are allowed
– Deny Listed IPs are blocked
– Unknown IPs are blocked
In this mode, the Allow List becomes essential.
Only explicitly allowed IPs can access the protected areas.
Important Notes
Before switching to a deny-by-default IP policy, make sure:
– Your own current IP is in the Allow List
– Any trusted admin or office IPs are included
– You understand whether your IP is static or dynamic
If your internet provider changes your IP address regularly, you may need to update the Allow List later.
If your site is behind a proxy or CDN, make sure Authica is detecting the correct visitor IP address.