Emergency Allow List
The Emergency Allow List contains the trusted IP addresses and CIDR ranges that are allowed to access protected areas while Emergency Lockout is active.
When Emergency Lockout is enabled, Authica denies access by default and allows only the IPs or ranges listed on this page.
This page is especially important because it controls who can still reach the login area or WordPress admin during an emergency lockout.
What the Emergency Allow List Is Used For
Use the Emergency Allow List to define which IPs should remain trusted during an incident.
Typical entries include:
– Your current IP
– Your office IP
– Trusted administrator IPs
– Company VPN IPs
– Maintenance team IPs
– Trusted network ranges
If an IP is not on this list, it will not be able to access the protected areas covered by Emergency Lockout.
Important Behavior
The page notice explains:
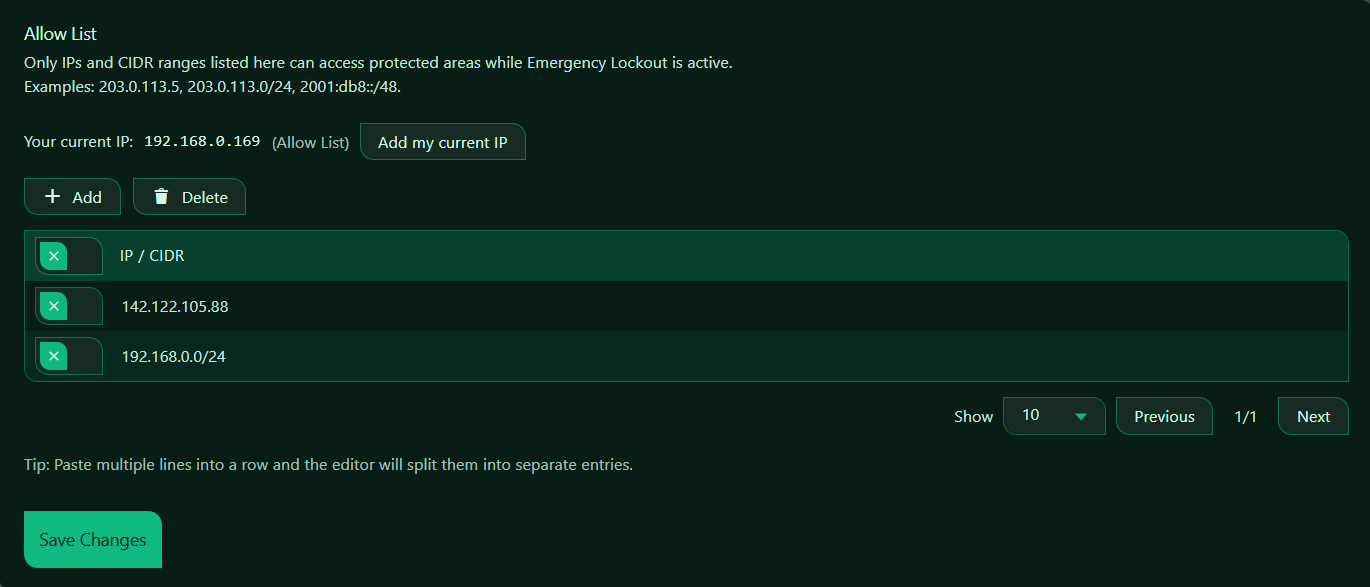
Only IPs and CIDR ranges listed here can access protected areas while Emergency Lockout is active.
That means:
– Emergency Lockout ON = only Emergency Allow List entries are trusted
– Emergency Lockout OFF = this list does not control normal access by itself
So this list matters specifically during Emergency Lockout.
Supported Formats
The Emergency Allow List accepts:
– Single IPv4 addresses
– IPv4 CIDR ranges
– Single IPv6 addresses
– IPv6 CIDR ranges
Single IP Address
Use a single IP when you want to allow one exact address only.
CIDR Range
Use a CIDR range when you want to allow a subnet or trusted network.
Use CIDR carefully. A wider range allows more addresses.
Your Current IP
Authica shows your current detected IP at the top of the page.
This helps you confirm whether your current connection is already trusted for Emergency Lockout.
This is one of the most important things to check before enabling Emergency Lockout.
Recommended step:
Make sure your current IP is on the Emergency Allow List before enabling Emergency Lockout.
Add My Current IP
The Add my current IP button adds your current detected IP address to the Emergency Allow List.
This is the fastest and safest way to prepare for Emergency Lockout.
Recommended usage:
Before enabling Emergency Lockout, click “Add my current IP” and then save changes.
This helps prevent accidentally locking yourself out.
Important note:
If your internet connection uses a dynamic IP, your IP may change later. In that case, you may need to update this list again.
Add Button
The Add button inserts a new empty row into the table.
Use it when you want to manually add a trusted IP or CIDR range.
Recommended usage:
Use Add when entering trusted IPs one by one.
Delete Button
The Delete button removes selected entries from the Emergency Allow List.
Select one or more rows first, then click Delete.
Use this when:
– A trusted IP is no longer needed
– A temporary admin IP should be removed
– An office or VPN IP changed
– You added an entry by mistake
Be careful not to remove your own current trusted IP if you still need access during Emergency Lockout.
Selection Column
The first column is used to select rows for deletion or bulk actions.
Select the entries you want to remove, then click Delete.
If no rows are selected, Delete will usually do nothing.
IP / CIDR Column
The IP / CIDR column contains the trusted addresses or ranges that will be allowed during Emergency Lockout.
These are the entries Authica uses to decide who is allowed to access the protected areas while lockout is active.
Good candidates for this list include:
– Your own current IP
– Trusted office IPs
– Administrator home IPs
– Company VPN ranges
– Trusted support or maintenance IPs
Save Changes
After adding, editing, or deleting Emergency Allow List entries, click Save Changes.
Recommended Configuration
For most sites, the Emergency Allow List should contain only the minimum trusted IPs needed during an incident.
Recommended entries:
– Your current administrator IP
– One backup administrator IP
– Trusted office or VPN range
Recommended approach:
Keep this list small and intentional.
Only allow IPs that truly need emergency access.
This reduces risk during a lockout event.
Best Practices
Recommended best practices:
– Always add your current IP before enabling Emergency Lockout
– Keep a backup trusted IP on the list if possible
– Use narrow ranges instead of broad ranges whenever possible
– Remove old or temporary entries when they are no longer needed
– Test Emergency Lockout carefully after change
Avoid allowing large IP ranges unless you are certain the whole network should remain trusted.
Important Notes
The Emergency Allow List is different from normal everyday access behavior.
This list is specifically used while Emergency Lockout is active.
If your current IP changes often, such as on home internet, mobile internet, or some VPNs, you may need to update this list before using Emergency Lockout.
If your site is behind a proxy or CDN, make sure Authica is detecting the real visitor IP correctly.