Backup & Restore
Backup & Restore lets you export, import, or remove Authica settings.
This is useful when moving Authica settings to another site, saving a configuration before major changes, restoring a previous setup, or resetting Authica completely.
Authica backups are exported as a JSON file and include Authica options and Customizer values that begin with: authica_.
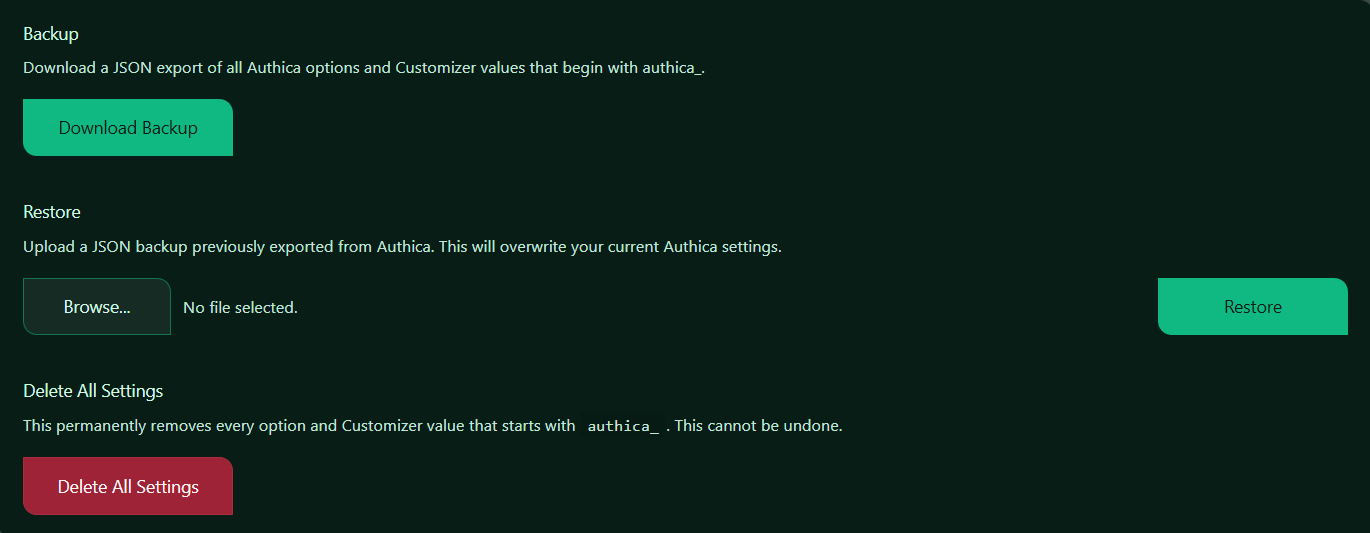
Backup
The Backup section lets you download a JSON export of your current Authica configuration.
This backup can include:
– Authica security settings
– Login customization settings
– Customizer values
– Appearance options
– Feature configuration values
Use this before making major changes, updating settings, migrating a site, or testing a new configuration.
Download Backup
The Download Backup button creates and downloads a JSON backup file.
Recommended usage:
Click Download Backup before making major Authica changes.
Good times to create a backup:
– Before changing security settings
– Before editing login page appearance
– Before migrating to another site
– Before restoring older settings
– Before deleting all settings
– After finishing a stable configuration
Keep the backup file somewhere safe.
Restore
The Restore section lets you upload a previously exported Authica JSON backup.
Restoring a backup will overwrite your current Authica settings with the values from the uploaded file.
Important:
Restore replaces your current Authica configuration.
Use this only when you want to bring back a previous Authica setup or copy settings from another site.
Browse File
The Browse button lets you choose the Authica backup JSON file from your computer.
After selecting a file, the file name should appear beside the upload field.
Only use backup files exported from Authica.
Recommended file type: .json.
Restore Button
The Restore button imports the selected backup file.
After restore, Authica updates the saved settings and Customizer values included in the backup.
Recommended workflow:
1. Download a fresh backup of the current site first
2. Click Browse
3. Select the Authica JSON backup file
4. Click Restore
5. Review Authica settings after restore
6. Test the login page and security features
Delete All Settings
The Delete All Settings section permanently removes Authica settings from the site.
This includes Authica options and Customizer values that start with: authica_.
Use this only when you intentionally want to reset Authica configuration.
Important: This cannot be undone unless you have a backup.
Before deleting all settings, download a backup first.
Delete All Settings Button
The Delete All Settings button permanently removes Authica settings from WordPress.
This is useful when:
– You want a clean Authica reset
– You are removing test/demo settings
– You are troubleshooting configuration issues
– You want to start over from default settings
Use this carefully on production websites.
Recommended workflow before deleting:
1. Click Download Backup
2. Save the backup file safely
3. Confirm you really want to reset Authica
4. Click Delete All Settings
5. Reconfigure Authica or restore a backup if needed
Recommended Usage
For most websites, use Backup & Restore like this:
Before major changes: Download Backup
Before migration: Download Backup
Before restore: Download current backup first
Before reset: Download Backup
After final setup: Download Backup and store it safely
This gives you a recovery path if something is changed by mistake.
Important Notes
A backup file may contain sensitive configuration values, depending on your Authica setup.
Store backup files securely and do not share them publicly.
Restoring a backup from another site may overwrite URLs, appearance settings, feature settings, and other Authica configuration values. Always review the restored settings after import.